Smart security cameras give homeowners and small businesses a practical way to monitor property, deter intruders, and stay aware of daily activity. A camera works best only when you install it correctly and maintain it over time. Poor placement, weak settings, or lack of maintenance can reduce image quality and cause missed alerts. Many users focus on buying a camera but overlook setup and care. That mistake often leads to false notifications, blind spots, or connection issues. This guide explains how to set up smart security cameras step by step and how to keep them running smoothly. It covers camera placement, installation basics, essential settings, and long-term maintenance tips. Each section uses clear language and practical advice. You will learn how to improve coverage, protect privacy, and extend the life of your system without extra cost or technical skills.
Ways to Set Up a Smart Security Camera the Right Way
Choosing the Best Camera Locations
Camera placement decides how useful your system will be. Start by identifying entry points such as front doors, back doors, garages, and ground-floor windows. These areas attract the most activity. Place cameras high enough to avoid tampering but low enough to capture faces clearly. A height of around 8 to 10 feet often works well. Avoid aiming cameras directly at bright light sources. Strong sunlight or reflections can wash out images and reduce night vision performance. Angle the camera slightly downward and adjust the field of view to cover walkways rather than wide open spaces. Indoors, focus on main hallways or rooms with valuable items, not private spaces like bathrooms or bedrooms. Good placement reduces blind spots and lowers the chance of false motion alerts.
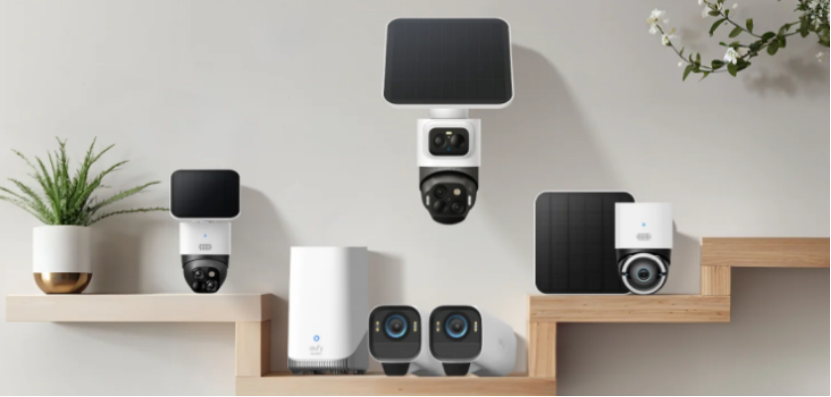
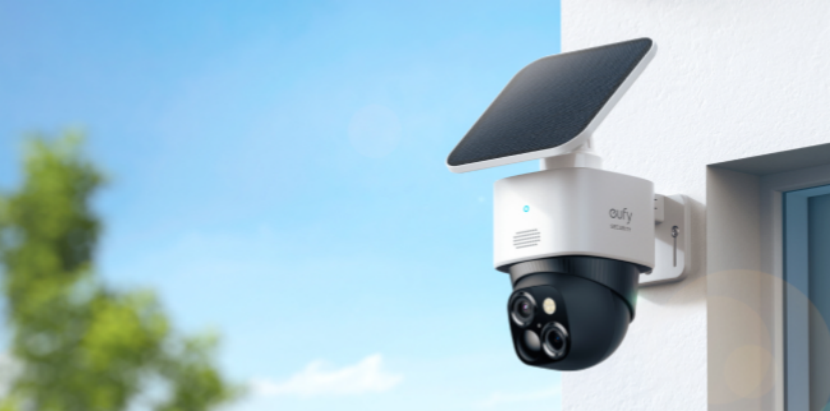
Installing Indoor vs. Outdoor Cameras
The indoor and outdoor cctv camera for home need different installation approaches. Indoor cameras usually require less protection. You can mount them on shelves, walls, or ceilings. Make sure they sit near a power outlet or have a clear charging plan if they run on batteries. Keep them away from heat sources like kitchens or direct sunlight from windows. Outdoor cameras face weather, dust, and temperature changes. Install them under eaves or sheltered areas when possible. Secure all mounting screws tightly and seal cable holes to keep water out. Check that the camera rating matches outdoor use. Cold or extreme heat can drain batteries faster, so plan power sources carefully. Proper installation protects the camera and keeps footage stable in all conditions.
Connecting Cameras to Wi-Fi and Mobile Apps
A stable connection is essential for live viewing and alerts. Place cameras within strong Wi-Fi range. If the signal is weak, consider moving the router closer or using a Wi-Fi extender. During setup, connect cameras to a secure network with a strong password. Avoid public or open networks. After connecting, install the companion app and follow setup steps carefully. Name each camera based on its location, such as “Front Door” or “Living Room.” Clear labels help you manage alerts and footage later. Test live view and motion alerts before finishing setup. This quick check confirms that the camera works as expected.
Essential Configuration Settings for Daily Protection
Adjusting Video Quality, Resolution, and Frame Rate
Video settings affect both image clarity and storage use. Higher resolution shows more detail but uses more bandwidth and storage. Choose a balanced setting that fits your internet speed. Many users select high definition for outdoor cameras and standard definition for indoor monitoring. Frame rate controls how smooth the video looks. A higher frame rate captures motion clearly but consumes more data. For most homes, a moderate frame rate works well. Adjust night vision settings and infrared sensitivity to match lighting conditions. Test recordings during the day and at night to confirm that faces and objects remain clear.
Motion Detection Zones and Sensitivity Settings
Motion detection is useful only when configured correctly. Start by drawing activity zones around areas where people usually move, such as paths or doorways. Exclude trees, busy roads, or pets’ play areas. This step reduces unnecessary alerts. Next, adjust sensitivity levels. High sensitivity detects small movements but can trigger false alerts. Lower sensitivity reduces notifications but may miss subtle motion. Test different levels for a few days. Fine-tuning these settings helps the camera focus on real security events instead of constant background movement.
Notifications, Alerts, and Cloud vs. Local Storage
Alerts keep you informed, but too many can become annoying. Choose which events trigger notifications. For example, enable alerts for human detection but disable them for general motion. Set quiet hours if the app allows it. Storage choice also matters. Cloud storage offers easy access and backup but may require a subscription. Local storage gives more control and avoids ongoing costs but depends on device capacity. Decide based on your budget and how often you review footage. Whatever you choose, regularly check storage space to avoid missing recordings.
How Can You Maintain Smart Security Cameras for Long-Term Use?
Cleaning Lenses and Checking Camera Housing
Dirt and dust slowly reduce image quality. Clean camera lenses every few months using a soft cloth. Avoid harsh chemicals that can damage the lens coating. For outdoor cameras, check for spider webs, rain spots, or pollen buildup. Inspect the camera housing for cracks or loose mounts. Tighten screws if needed and ensure the camera still points in the correct direction. Small adjustments over time keep the view accurate. Regular cleaning improves video clarity and helps the camera last longer.
Firmware Updates and App Maintenance
Manufacturers release firmware updates to improve performance and fix security issues. Enable automatic updates if possible. If not, check for updates through the app every few months. Updated firmware keeps the camera compatible with new features and reduces bugs. Also update the mobile app itself. An outdated app can cause connection problems or missing notifications. After updates, review settings to ensure nothing changed unexpectedly. Consistent updates protect both your camera system and your personal data.
Power Supply, Battery Care, and Cable Management
Power issues cause many camera failures. For wired cameras, inspect cables for wear or damage. Secure loose cables to prevent accidental unplugging. Use weather-resistant covers for outdoor connections. For battery-powered cameras, follow a charging schedule. Recharge before batteries drop too low, as deep discharge shortens battery life. In cold weather, check batteries more often. Good power management ensures continuous monitoring and reduces downtime.
Conclusion
Smart security cameras provide strong protection when installed and maintained correctly. Proper placement improves coverage and reduces blind spots. Careful setup of video quality, motion detection, and alerts makes daily monitoring more reliable. Regular maintenance, such as cleaning lenses and updating software, keeps the system working smoothly over time. You do not need advanced technical skills to get good results. Simple checks and small adjustments make a big difference. By following these setup and maintenance tips, you can improve security, reduce false alerts, and extend the life of your cameras. A well-maintained system offers peace of mind and dependable protection every day.